
First Run
This page walks you through Omnibot's first launch and basic setup. Do not rush to enable every feature on the first pass. Focus on confirming these items first:
- The app can launch normally
- Core permissions are granted
- A remote model can be called
- Scene models are bound
- The workspace directory has initialized
- The chat page can complete one minimal execution path
If any step fails, stop there and troubleshoot it first. It is usually not worth jumping straight to skills, MCP, or local models before the base path works.
Step 1: Install and open the app
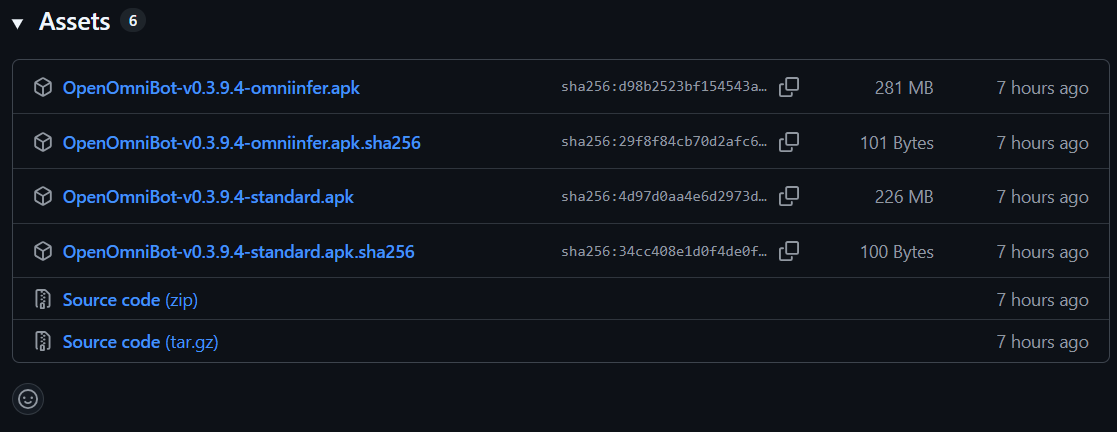
Download the package that matches your current device:
GitHub Release: https://github.com/omnimind-ai/OpenOmniBot/releases
CNB, recommended for mainland China networks: https://cnb.cool/o.a/OpenOmniBot/-/releases
Current releases usually provide two package variants:
- Standard version: smaller and better for first validating remote models, chat, permissions, and the workspace.
- Version with local inference: includes on-device model inference capabilities and is better for validating local models later.
The in-app auto-updater will keep using your currently installed package type. To switch between the two package types, manually install the other package once to overwrite the current one.
For development builds, use:
./gradlew :app:installDevelopStandardDebug -Ptarget=lib/main_standard.dart
./gradlew :app:installDevelopOmniinferDebug -Ptarget=lib/main_omniinfer.dart
For your first run, install the standard version first. After the remote model and execution path are working, switch to the local inference version. This makes it easier to tell whether a problem comes from the model, permissions, workspace, or local inference environment.
Step 2: Wait for first initialization
After opening Omnibot for the first time, you will see the welcome page while the app prepares the Alpine runtime, workspace directory, and default configuration in the background.
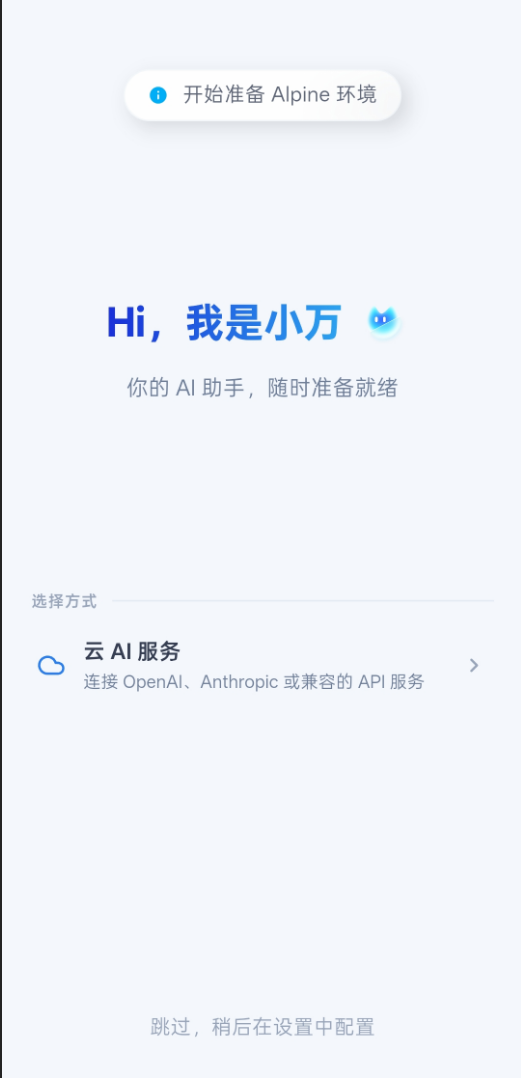
At this step:
- Keep the app in the foreground. Do not immediately send it to the background or clear the process.
- If the system shows permission prompts for notifications, background execution, overlays, or similar capabilities, allow the app to enter the corresponding settings page.
- Wait until you can normally enter the chat page, settings page, or authorization page before configuring models.
Initialization is usually complete when:
- The app no longer stays repeatedly on the welcome or initialization page
- The settings page can open
- The authorization page can show permission status
- Workspace-related pages can later display directories normally
If initialization stays stuck, first check device storage space, network status, and whether the system is restricting background services.
Step 3: Complete the core permissions
Omnibot is not just a chat app. It needs to read the screen, perform taps, enter text, open files, and show floating operation layers. Permissions are the foundation of its execution capability. On first launch, open the authorization page and grant these four permissions first:
| Permission | Purpose | Common behavior when missing |
|---|---|---|
| Background execution | Reduces the chance of system cleanup and keeps tasks and companion flows more stable | Tasks stop halfway, or the app loses connection easily after going to the background |
| Overlay permission | Shows operation layers, status layers, or browser overlays above other apps | The task can be understood, but the execution layer is invisible or cannot take over the UI |
| Installed apps access | Identifies which target apps are available on the device | The agent cannot find an app you ask it to open, or judges it incorrectly |
| Accessibility service | Performs taps, input, scrolling, and UI tree reading | The agent can only reply with text and cannot actually operate the phone |
Then add these permissions based on the capabilities you need:
- Notifications: for task status, reminders, and foreground service prompts.
Shizuku: for some advanced system capabilities, but it is not required for the first successful run.- Storage / file-related permissions: for workspace, attachments, file picking, and generated output access.
- Calendar and exact alarms: for reminders, scheduled tasks, and future execution.
- Microphone or media permissions: for voice input, screenshots, media reading, and related extended scenarios.
WARNING
If accessibility and overlay permissions are missing, many failures look like "Omnibot understood the task, but it just does not move." In that case, check the authorization page first instead of changing model configuration immediately.
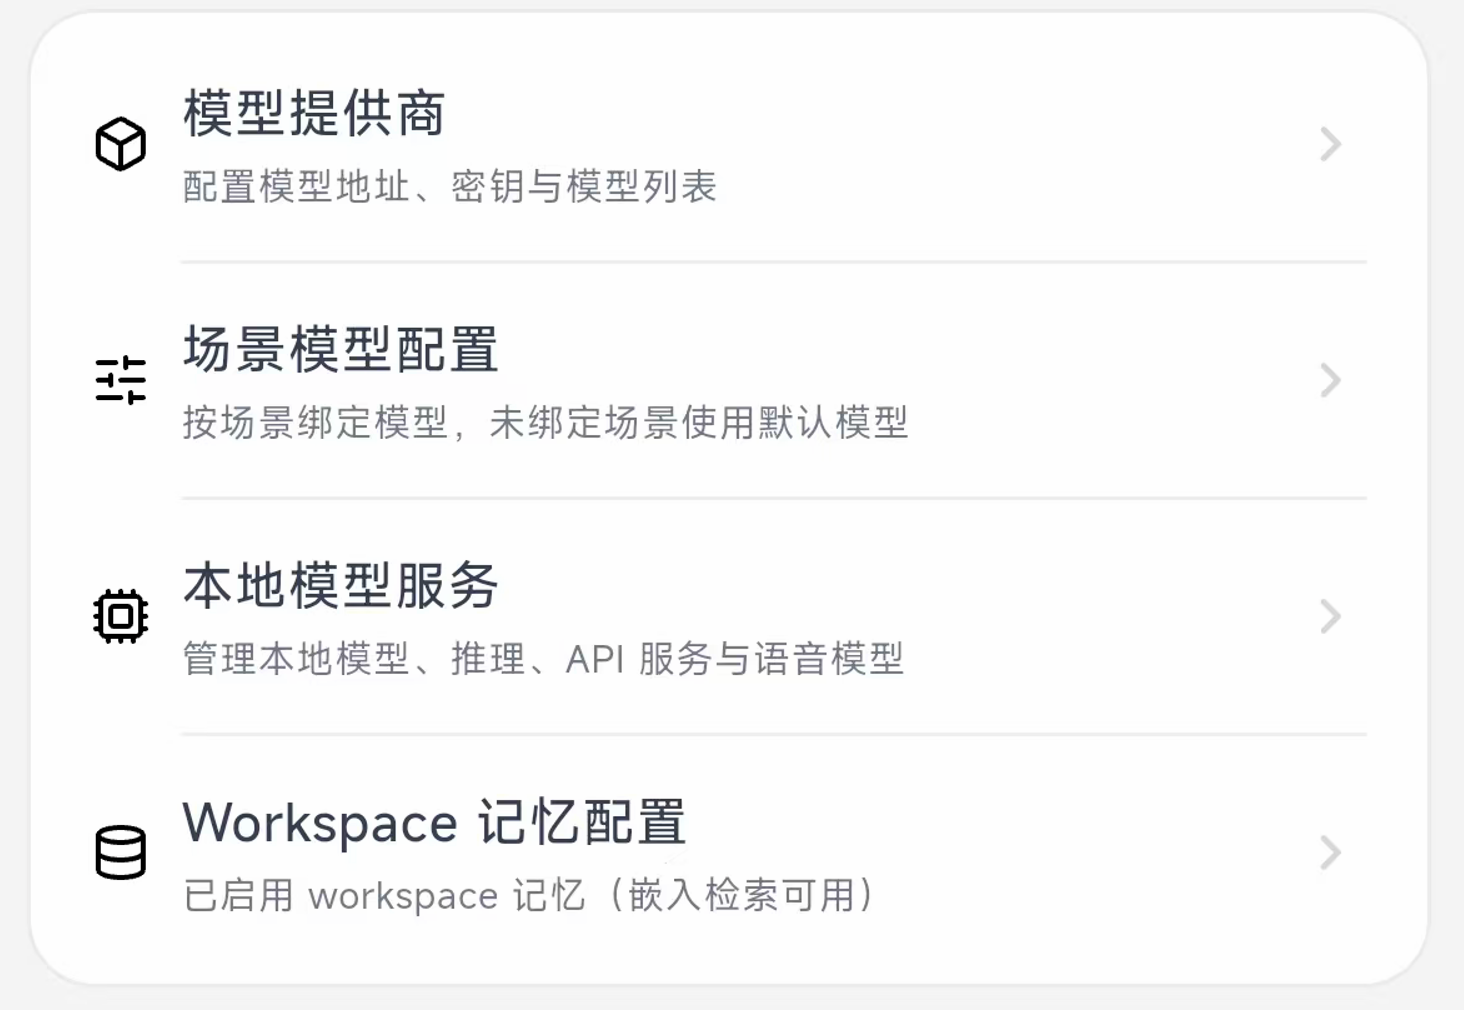
Step 4: Configure model providers
After the permissions are ready, go to model providers in settings and create a Provider Profile first.
- If your service is compatible with the OpenAI protocol, choose
OpenAI-compatible. - If you use the Claude / Anthropic ecosystem, choose
Anthropic.
A Profile usually needs:
- Name: helps you distinguish different providers or use cases.
- Base URL: the API address provided by the service. OpenAI-compatible services usually need the
/v1layer, but follow the provider documentation. - API Key: make sure it does not include extra spaces.
- Available model IDs: model names must exactly match the IDs exposed by the provider.
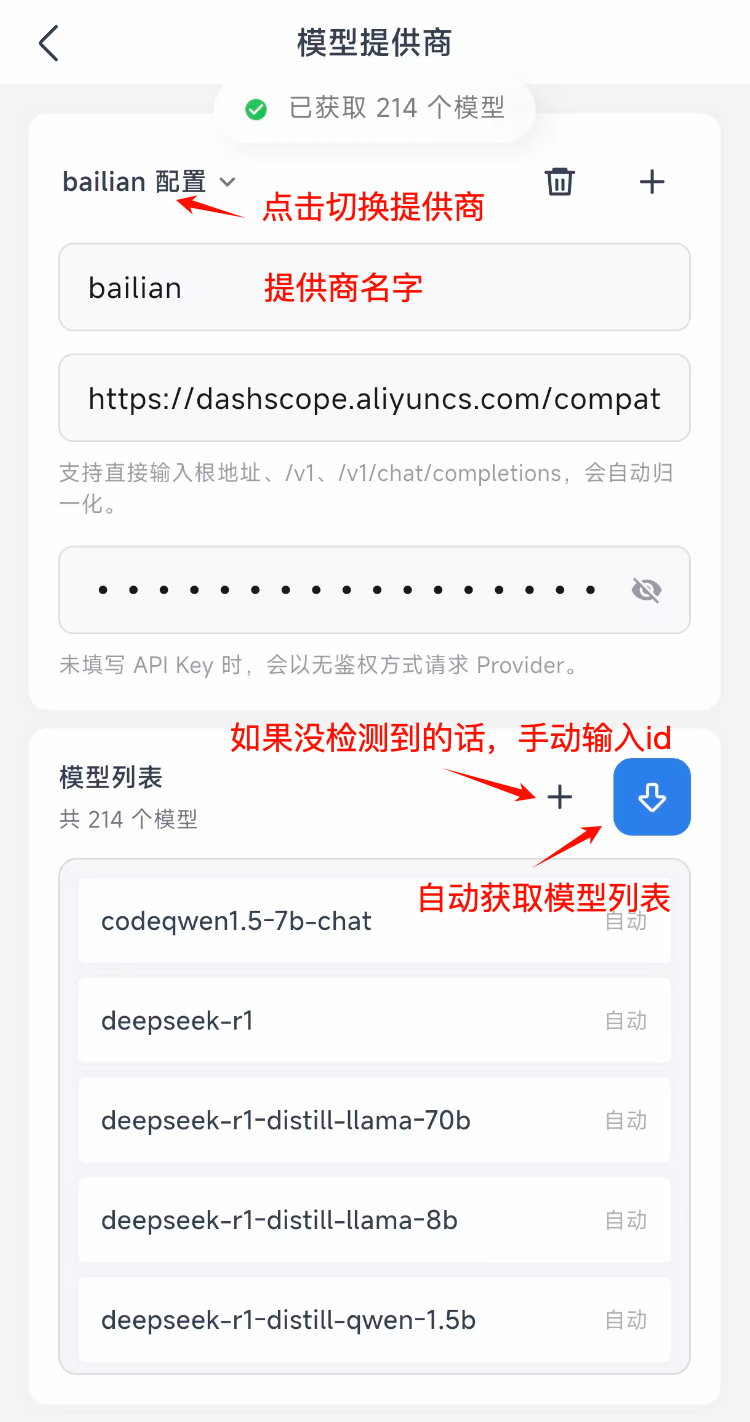
If the page supports syncing remote models, sync once first. If syncing fails, enter model IDs manually. During first launch, avoid connecting too many providers at once. Use one stable remote model to get the main flow working first.
Common configuration issues:
- The Base URL is missing
/v1or has an extra path segment. - The API Key was copied with spaces or line breaks.
- The model ID is a display name instead of the actual API model ID.
- A text-only model is assigned to a vision operation scene.
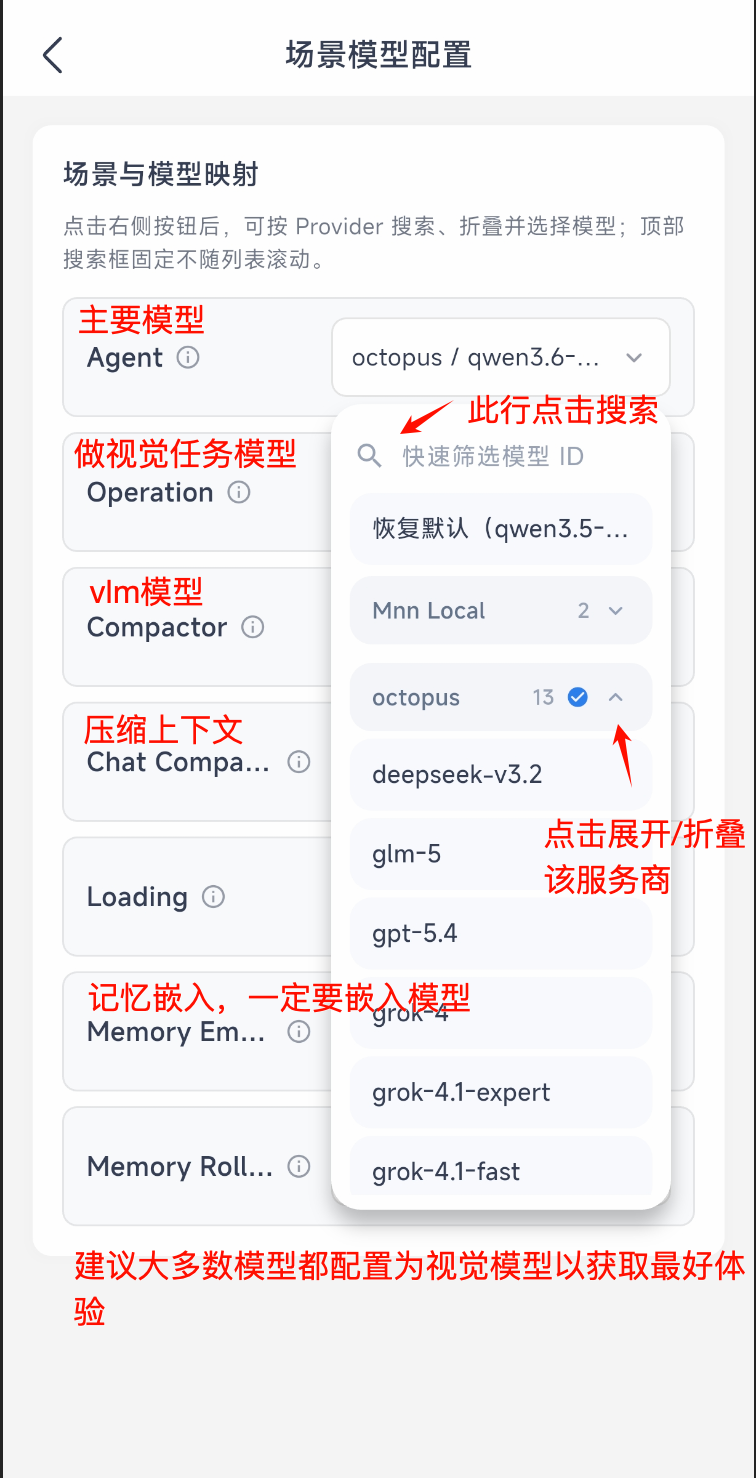
Step 5: Bind scene models
Creating a Provider only tells Omnibot which models are available. You still need to bind models to specific scenes. In Scene Model Configuration, the current version lists scenes including Agent, Voice, Operation, Compactor, Chat Compactor, Loading, Memory Embed, and Memory Rollup.
Each row has a model selection button on the right. Click it to search by Provider, expand groups, and choose a specific model. Scenes without an explicit binding continue to use the default model, so you do not need to fine-tune every item on the first pass. First make sure the main path can run.
| Scene | Recommended choice | Purpose |
|---|---|---|
Agent | Stable strong reasoning model | Understands user tasks, plans steps, and dispatches tools |
Voice | A model suitable for voice output flows, or the default model | Handles voice reply capabilities; voice and autoplay can be adjusted separately |
Operation | Multimodal model that supports vision / UI operation | Interprets screen content and decides taps, input, scrolling, and other actions |
Compactor | Fast, lower-cost summarization model | Compresses general context so long tasks do not slow down too much |
Chat Compactor | Fast and stable chat summarization model | Compresses chat context so long conversations remain continuable |
Loading | Default model or lightweight model | Supports model calls during loading, waiting, or transition states |
Memory Embed | A real embedding model | Generates vectors for memory and workspace retrieval |
Memory Rollup | Lower-cost summarization model | Organizes long-term memory and staged summaries |
If you only have one stable large model, you can temporarily bind Agent, Voice, Operation, Compactor, Chat Compactor, Loading, and Memory Rollup to it to validate the base flow. Configure Memory Embed with a dedicated embedding model whenever possible, because a normal chat model usually cannot replace it.
On the first setup, the most important scenes are Agent and Operation. The former determines whether Omnibot can understand and plan; the latter determines whether it can understand the screen and operate the phone. Voice is not required for the first successful run. If you do not need voice yet, keep Voice on the default configuration and adjust voice style and autoplay after the base path is stable.
Step 6: Check the workspace environment
Omnibot maintains a local workspace for attachments, generated files, browser data, memory, and model assets. After first launch, open the workspace page. The path at the top should show /workspace, and the .omnibot directory should appear below it.
After expanding .omnibot, you should normally see these directories:
/workspace
`-- .omnibot/
    |-- agent/
    |-- attachments/
    |-- browser/
    |-- memory/
    |-- models/
    |-- offloads/
    |-- pets/
    `-- shared/
Confirm that:
- The workspace page opens.
- The path shows
/workspace. .omnibot/can be expanded.agent,attachments,browser,memory,models,offloads,pets, andsharedhave been generated.- There is no persistent initialization failure prompt.
If the workspace cannot open, or .omnibot is not generated after a long wait, check storage permissions and first initialization status. When the workspace is not ready, attachments, memory, browser data, local models, and some file processing capabilities are affected.
Step 7: Validate one minimal execution path
Do not test complex automation yet. First run one minimal task from the chat page. Start with something that does not depend on an external app:
- Enter a simple request.
- Watch whether tool activity, execution cards, or status changes appear.
- Check whether the response reflects the current page, workspace, or permission status.
- If the request involves phone operation, observe whether accessibility and overlay permissions are actually used.
Recommended test tasks
- "Summarize what actions are available on the current screen."
- "Open the workspace and tell me what files are there."
- "List the installed skills."
- "Check which Omnibot permissions are not enabled yet."
A successful minimal path usually means Omnibot understands the task, calls the corresponding tool or page capability, and finally returns a result that matches the current device state.
If it can chat normally but does not execute actions, check the Operation scene model, accessibility permission, and overlay permission first. If it cannot even reply, check the Provider, API Key, Base URL, and Agent scene binding first.
Step 8: Enable advanced capabilities gradually
After the base path works, enable stronger capabilities one by one:
- Local models
- Skill store
- Scheduled tasks
- Local MCP service
- Remote MCP tools
- WebChat or Browser Mirror
Enable only one capability category at a time and run a small validation after each change. For example, install one lightweight skill and then verify the workspace; enable local MCP and then visit the health check; download one local model and then test model service status.
This way, if Omnibot runs into a problem, you will know which layer changed most recently.
Next, read Model and Scene Setup to continue refining remote models, local models, and scene responsibilities.