
Skills, Workspace, and Automation
After basic chat, models, and permissions are working, Omnibot enters the stage where it can truly get things done. Do not enable every capability at once. A good validation order is: skills -> workspace -> scheduled tasks -> browser-linked flows -> MCP.
The goal of this page is not to click every button once. It is to confirm three things:
- Skills can be installed, enabled, and discovered by the Agent in conversation.
- The workspace can store attachments, generated output, memory, browser data, and model assets.
- Automation tasks can run steadily with the right permissions, models, and runtime environment.
TIP
If you have not completed first launch, model binding, and core permission setup yet, go back to First Run first. Skills and automation depend on that base path. When the foundation is unstable, later failures become much harder to diagnose.
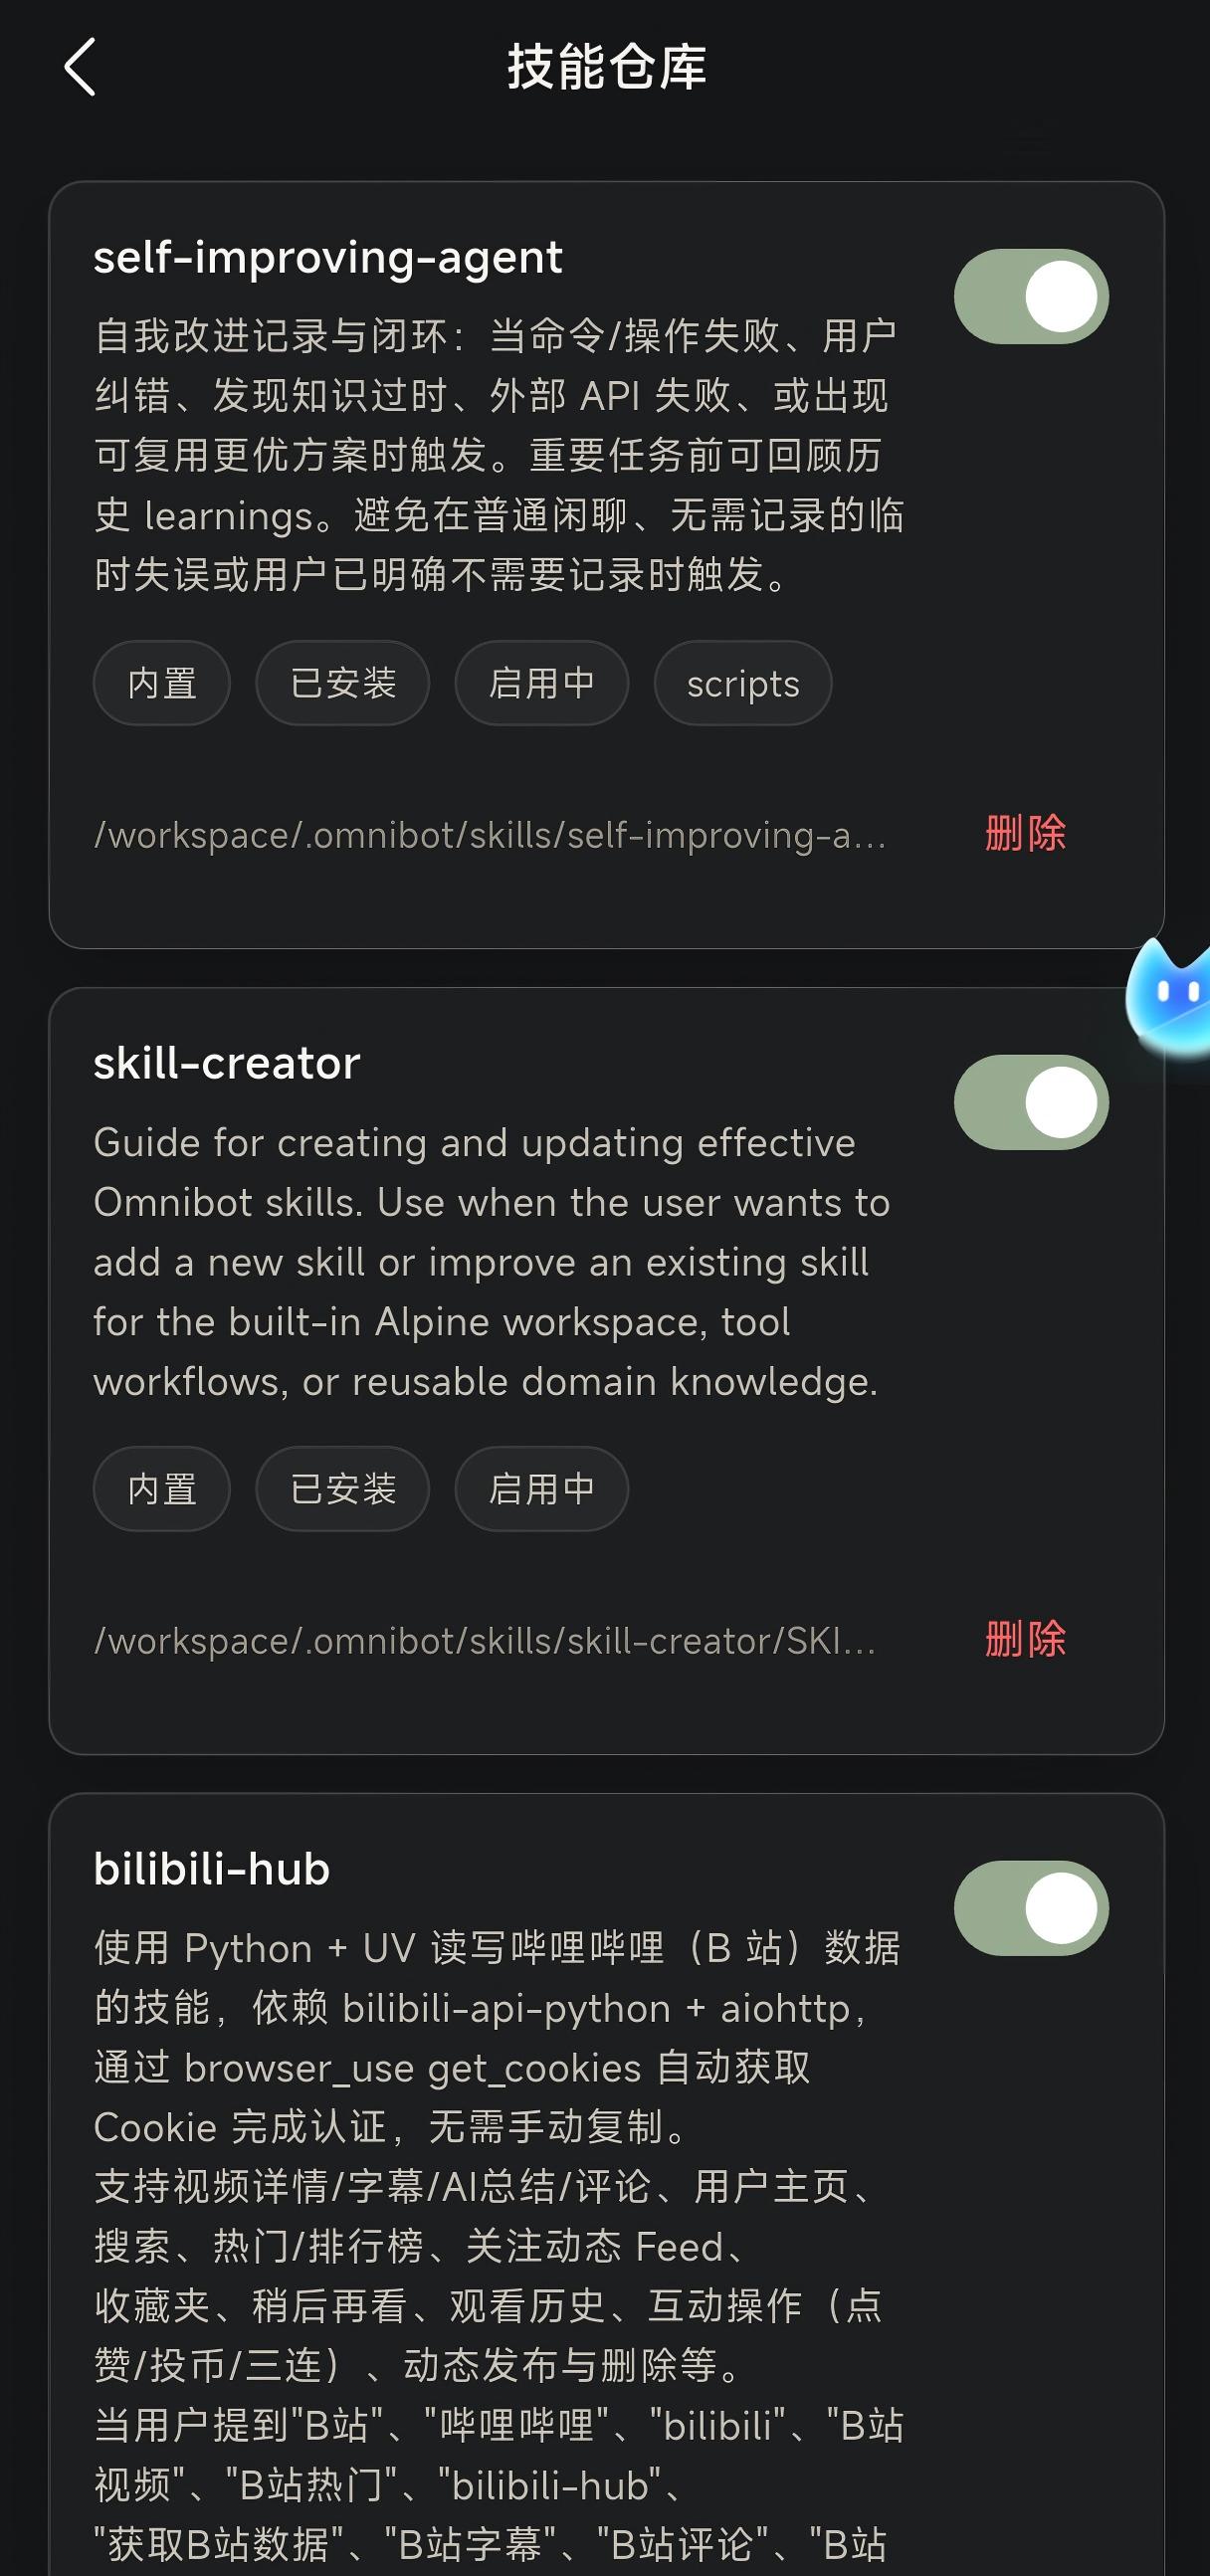
1. Start with the skill store
Skills are Omnibot's installable capabilities. You can think of them as toolkits that teach the Agent a category of work, such as file processing, web page handling, external service calls, or a specific workflow.
The skill store supports:
- Search skills
- Install built-in skills
- Enable / disable skills
- Delete skills
Start with lightweight skills that do not directly affect system stability. After the installation path is confirmed, gradually enable stronger automation capabilities. For the first pass, complete only one small loop: search for a skill, open its details, install it or confirm it is already installed, keep it enabled, and then return to chat so Omnibot can list the currently available skills.
You can ask directly:
List the skills that are currently installed and enabled, and explain what each skill is useful for.If Omnibot lists the skills correctly, the skill installation state, enablement state, and Agent discovery path are basically working.
2. Use the workspace
The workspace is Omnibot's persistent storage area, not just a file browser. Attachments, generated files, browser data, long-term memory, local models, and some tool results all depend on it.
The workspace page currently supports:
- Browsing directories
- Returning to parent directories
- Opening artifact previews
- Linking with chat and tool results
When you first open the workspace, confirm that the path at the top shows /workspace and that you can see the .omnibot/ directory. This directory is the core location for Agent configuration, memory, skills, and model assets.
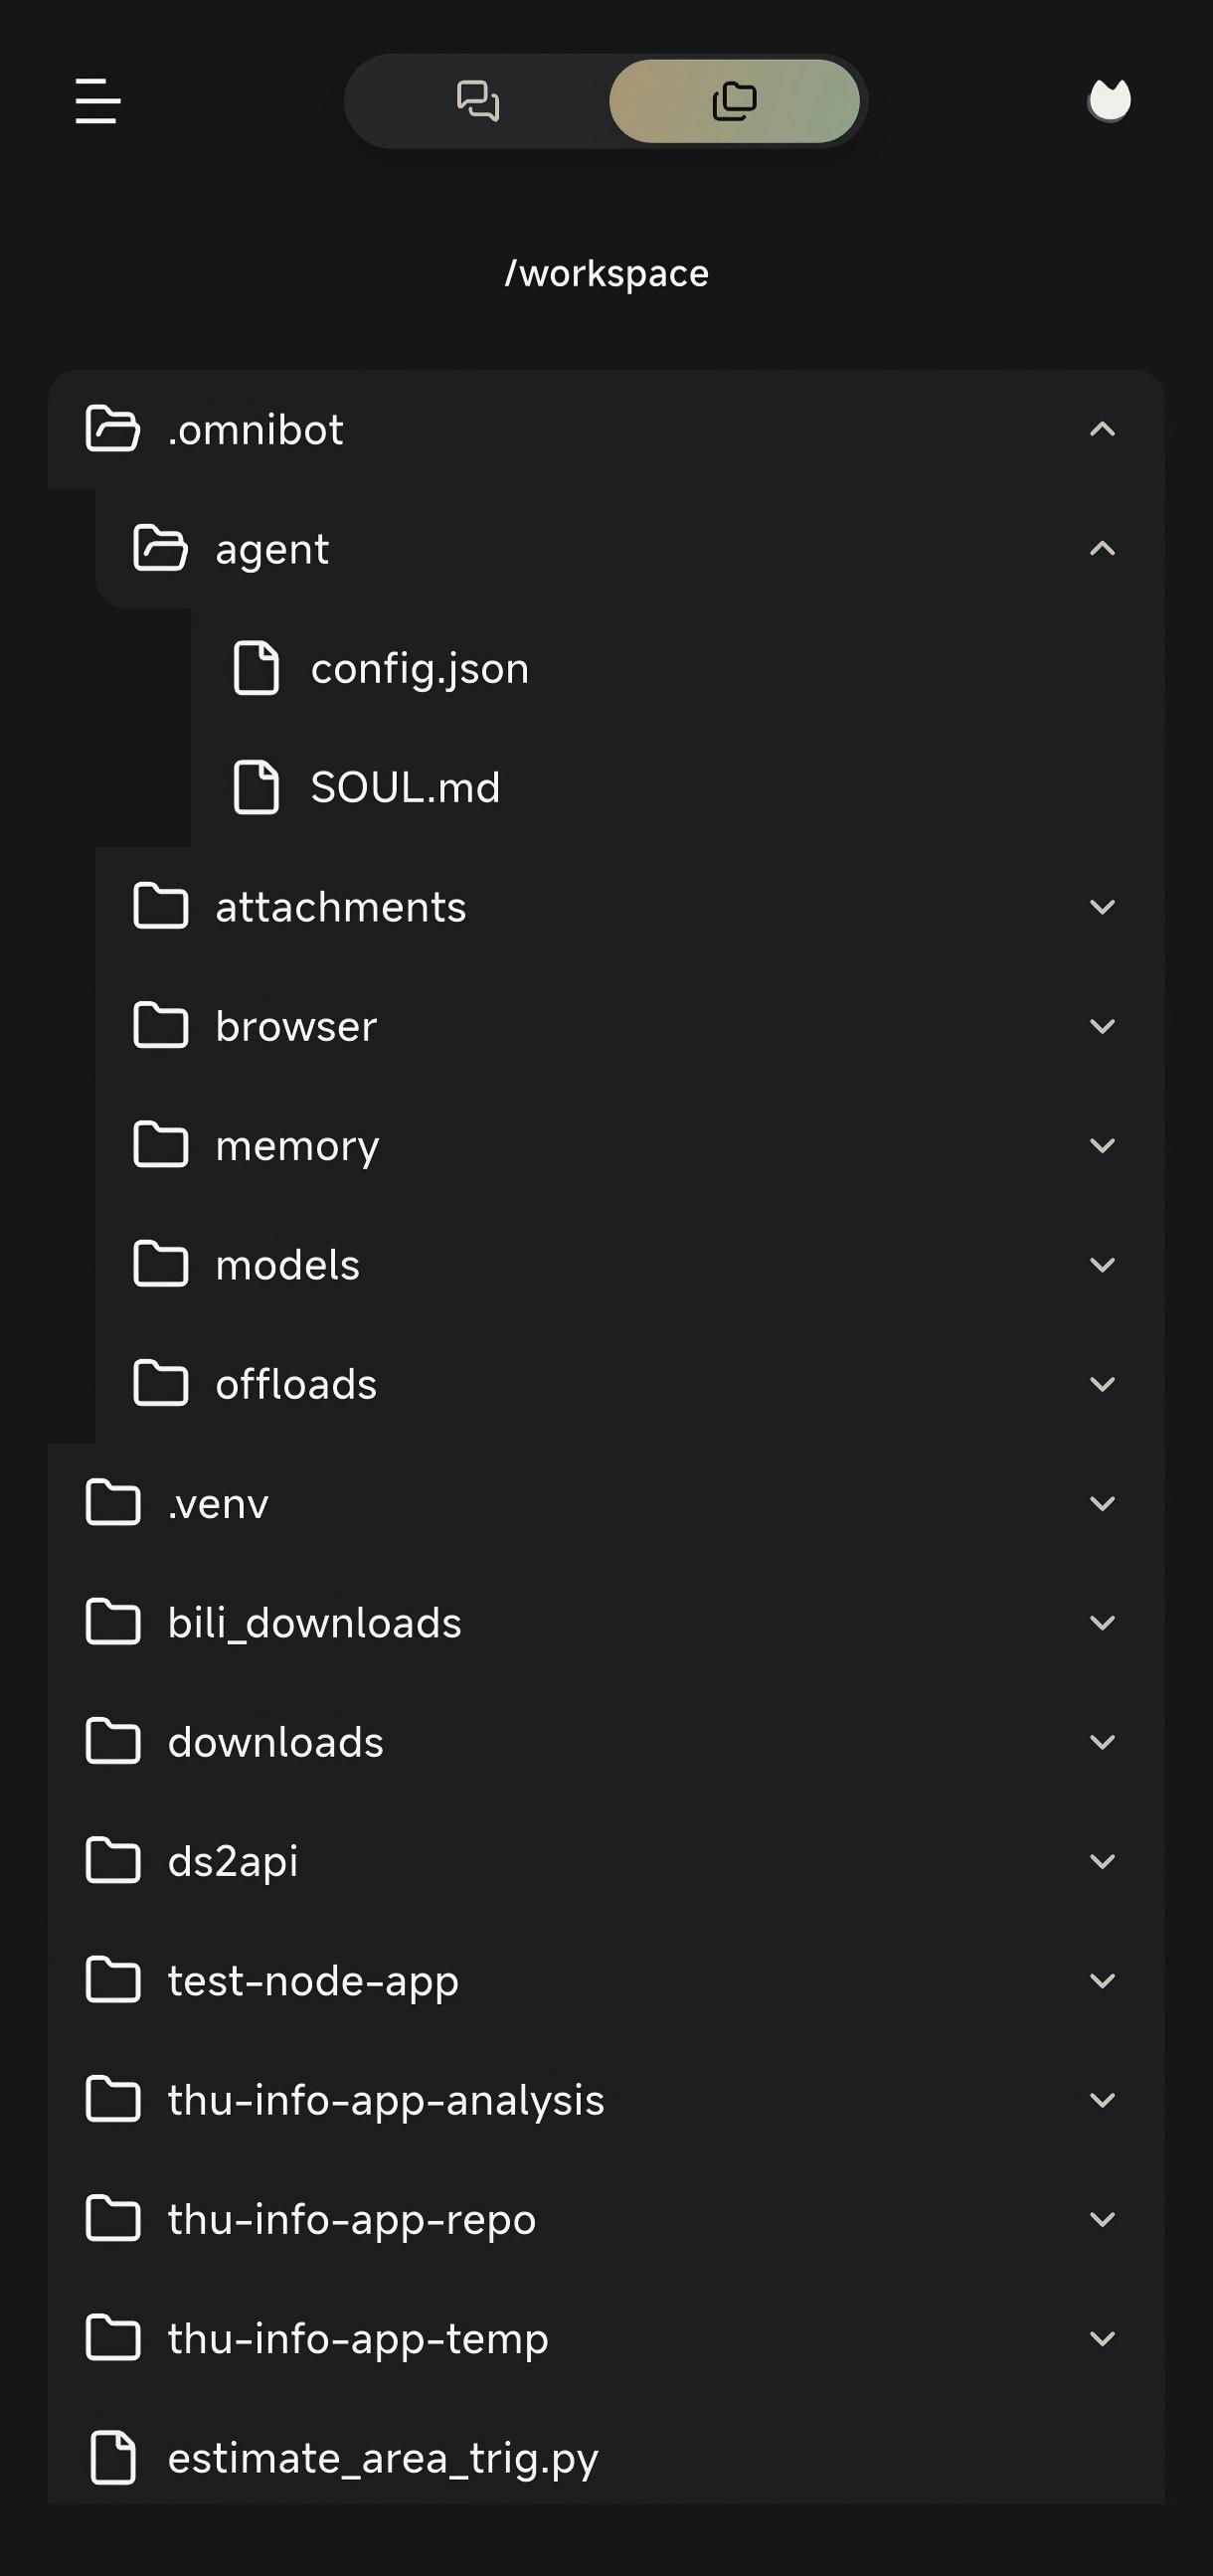
Directories to check first
/workspace
`-- .omnibot/
    |-- agent/
    |-- attachments/
    |-- browser/
    |-- memory/
    |-- models/
    |-- offloads/
    |-- pets/
    `-- shared/
You can understand these directories this way:
| Directory | Purpose |
|---|---|
agent/ | Agent configuration and runtime-related files |
attachments/ | Chat attachments, uploaded files, and some input materials |
browser/ | Browser overlay, Browser Mirror, or web-page-related data |
memory/ | SOUL.md, CHAT.md, MEMORY.md, and short-term memory |
models/ | Local model assets and model runtime directories |
offloads/ | Long-running tasks, offloaded data, or intermediate output |
pets/ | Companion, pet, or related resources |
shared/ | Shared files suitable for reuse across tasks |
Recommended validation tasks
Test these from the chat page one by one:
Open the workspace and tell me which files and directories are in the root directory.Check the .omnibot/memory directory and explain which files are related to long-term memory.If there are recently generated files in the workspace, help me open one preview.A normal workspace validation usually looks like this: the page opens, directories can be switched, files can be previewed, and Omnibot's response matches the current file structure.
WARNING
Do not casually delete directories under .omnibot/. They contain memory, skills, models, and runtime state. When you need to free space, prefer the in-app storage management page or delete only attachments and generated files you are sure you no longer need.
3. Teach the agent to handle scheduled tasks
Omnibot separates time-based capabilities into two categories:
- Alarm: a reminder that only notifies you at the specified time.
- Scheduled task: a future task that continues executing specific work.
If you only ask Omnibot to "remind me tomorrow", that is usually an Alarm. If you want it to "open a page tomorrow morning, check the content, and summarize it", that is closer to a Scheduled task.
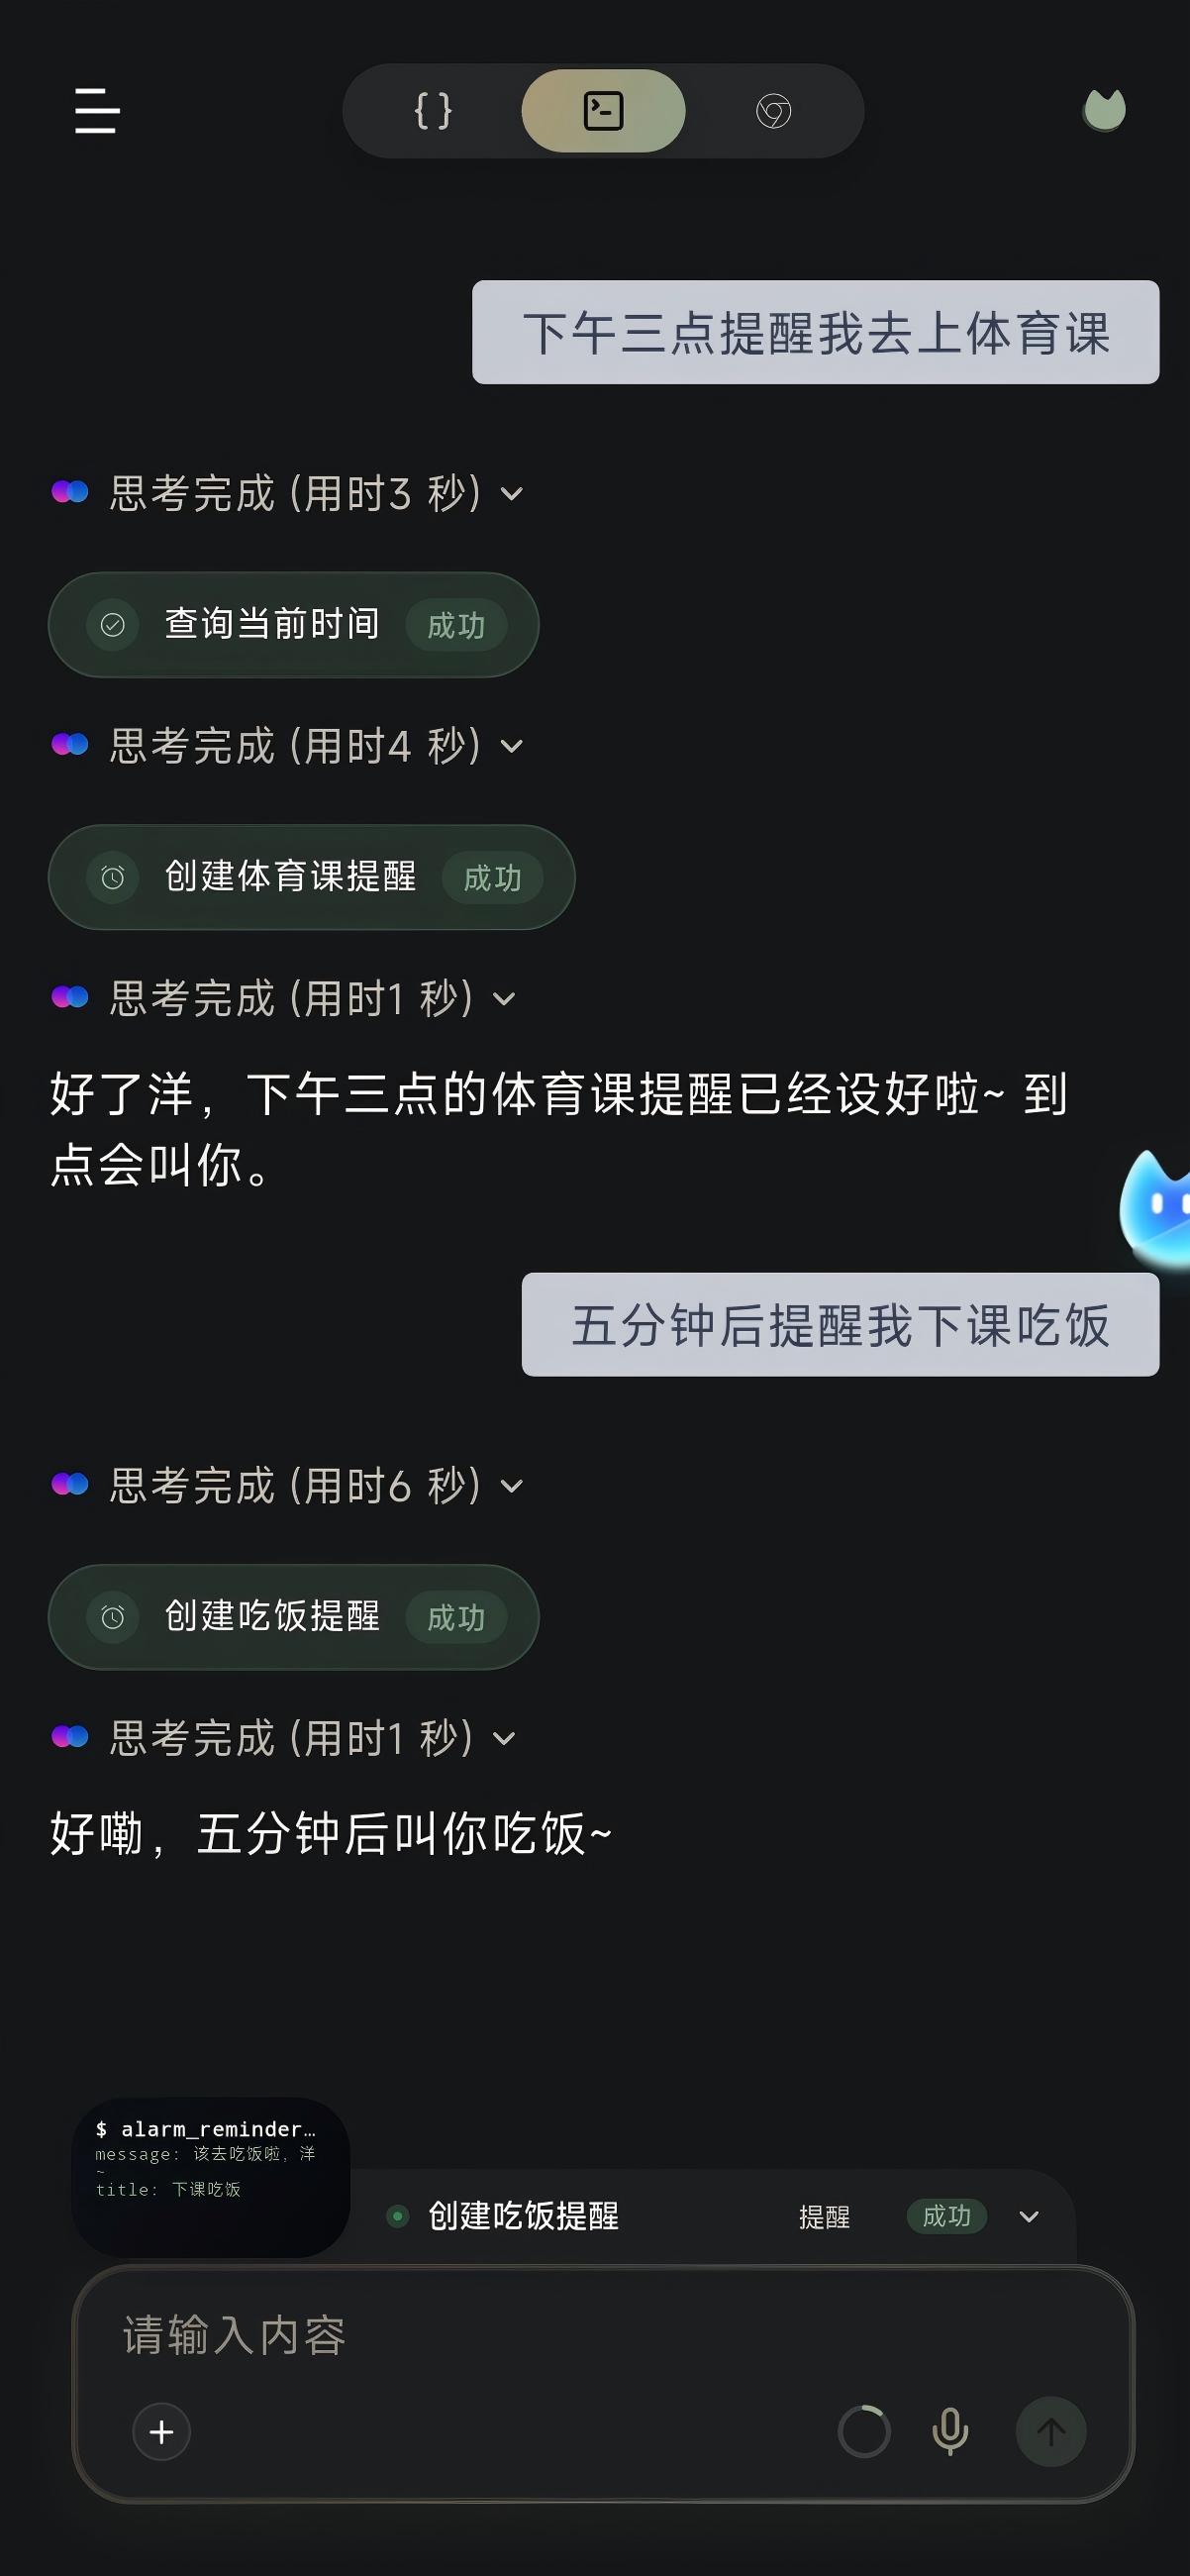

Start with a reminder
Use a low-risk task to validate the time path first:
Remind me in one minute to check whether Omnibot's scheduled tasks are working.Success criteria:
- The task can be created.
- A notification or reminder appears when the time arrives.
- After reopening Omnibot, you can still see the related task state.
If reminders work, test real scheduled execution:
In three minutes, help me open the workspace and summarize the main folders under the .omnibot directory.Success criteria:
- The task is restored when the scheduled time arrives.
- Omnibot enters the execution flow.
- The reply reflects the real workspace state.
Scheduled task troubleshooting order
| Symptom | Check first |
|---|---|
| Nothing happens when the time arrives | Notification permission, exact alarm permission, background execution permission |
| The task starts but stops during execution | Battery optimization, foreground service state, whether the system cleaned up the app |
| Reminders work but phone operation does not | Accessibility permission, overlay permission, Operation scene model |
| Operation works but the result is wrong | Current page state, whether the task description is clear, whether the vision model is stable |
4. Validate browser and workspace-linked flows
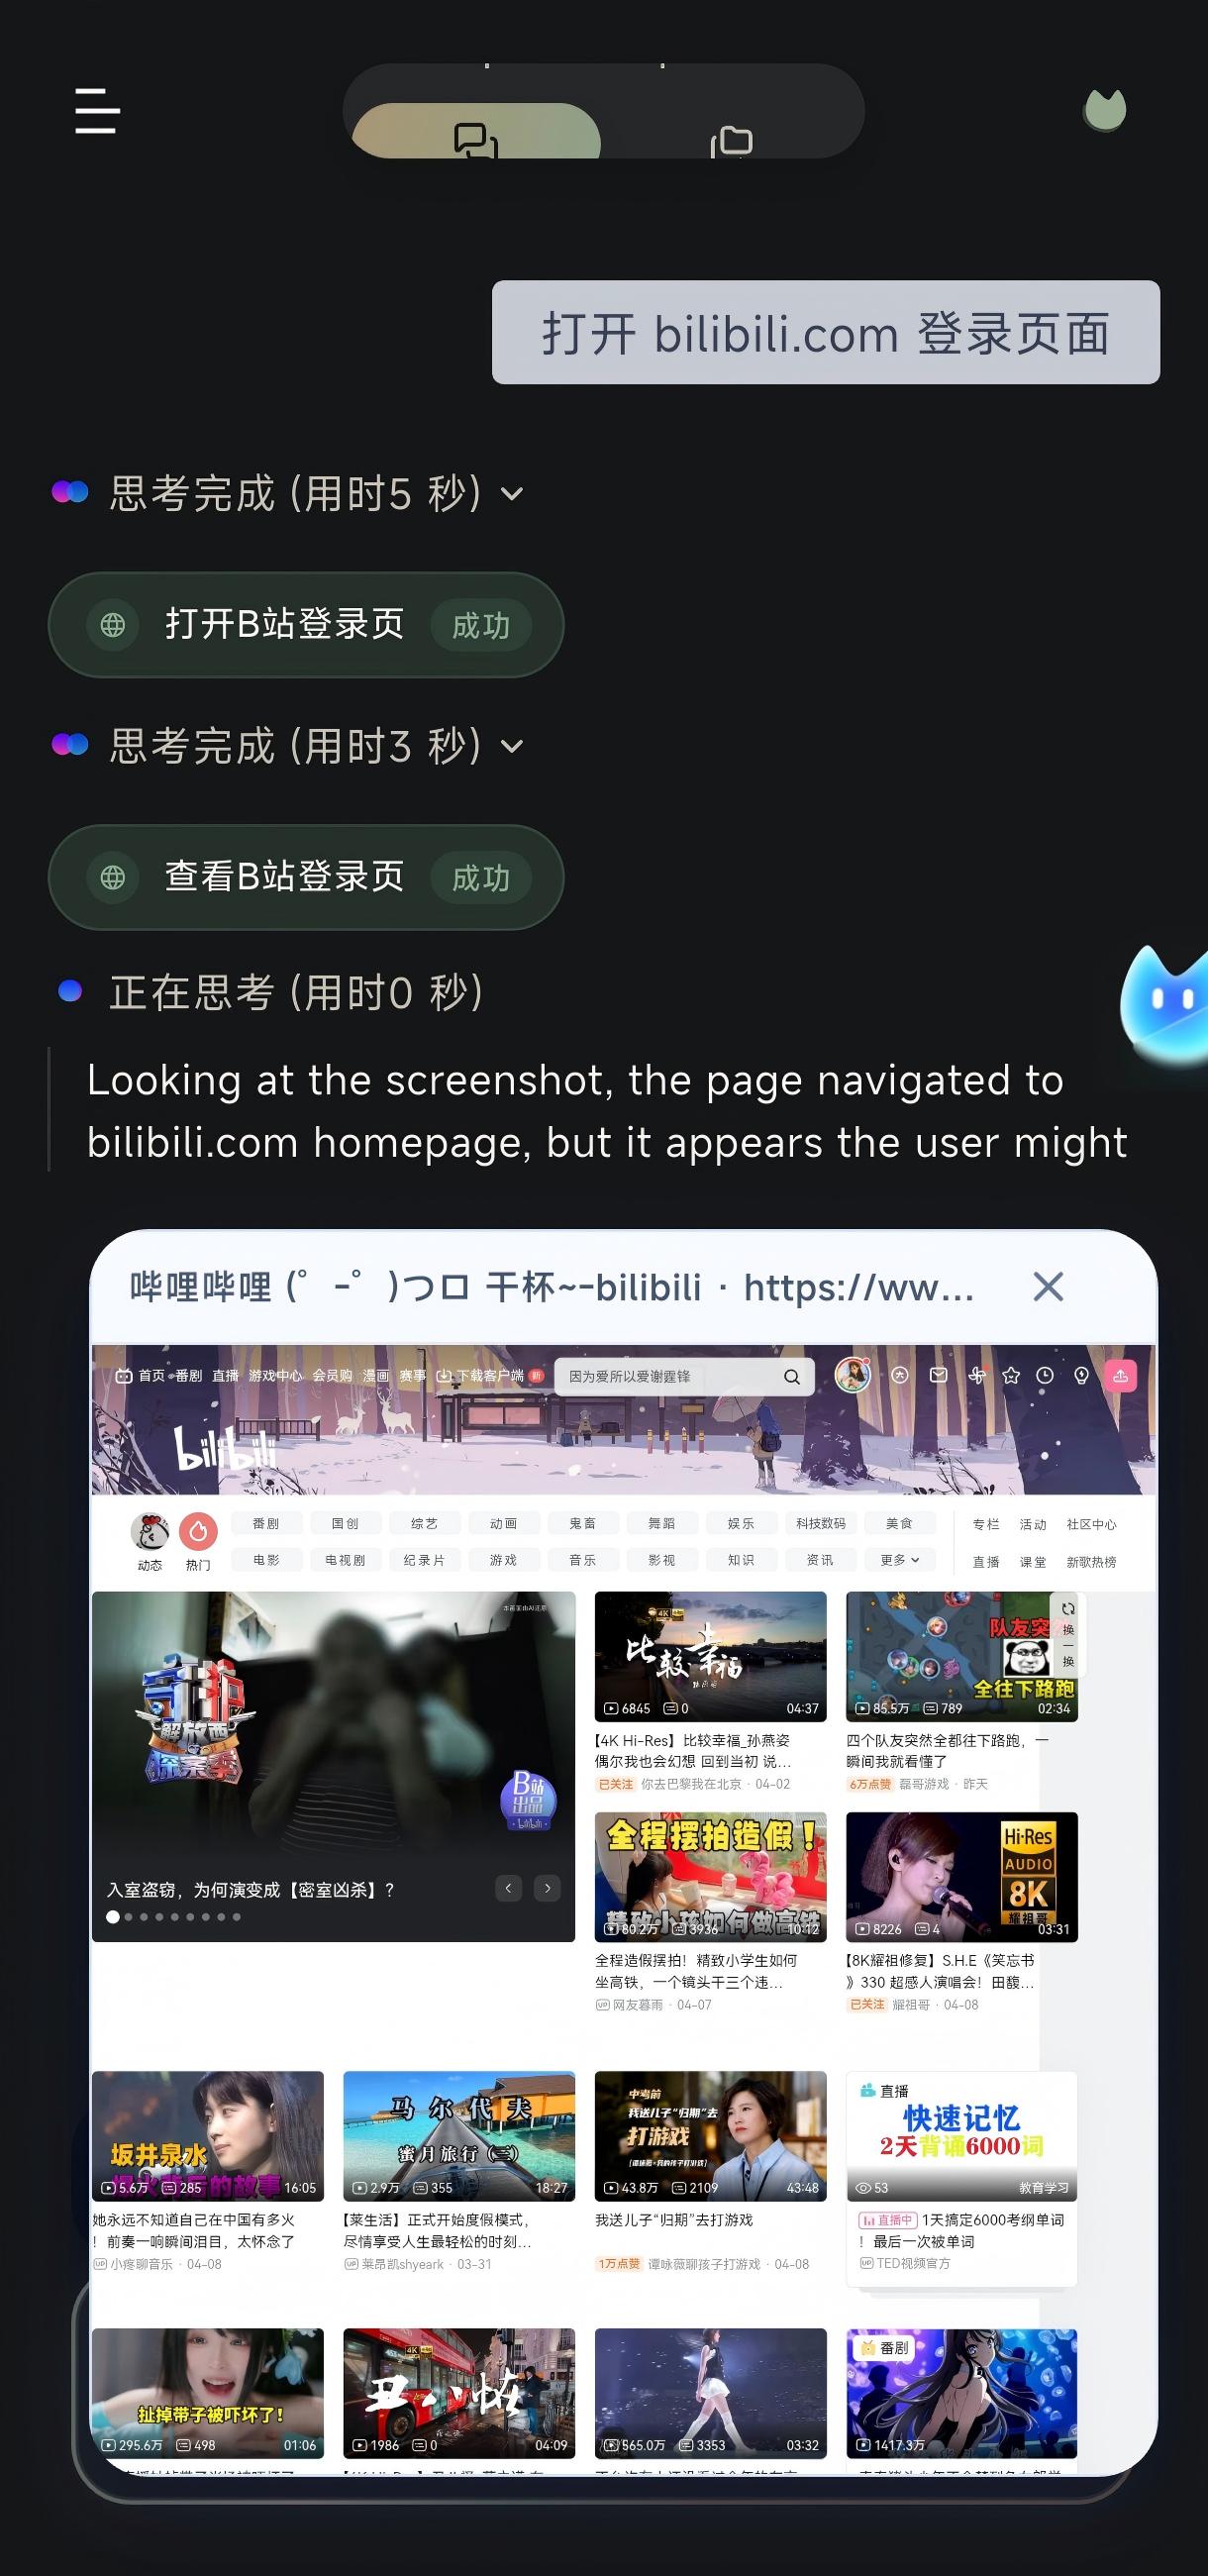
Browser capability is a good way to validate whether Omnibot can read web page content and save the result into the workspace. The chat page already includes browser overlays and file selection paths, so start with a read-only web task.
Recommended validation tasks
First ask Omnibot to open a page:
Open a web page, confirm whether the browser overlay is available, and then summarize the page title.Then validate workspace linkage:
Turn the key information from that web page into a short note and save it to the workspace.Finally validate file selection:
Select a file from the workspace and explain whether it can be used as an attachment for further processing.The success criteria for this part are: the browser overlay appears, Browser Mirror or page information can be read by Omnibot, and the generated note or attachment can be found in the workspace.
If the browser opens but no output appears in the workspace, first check storage permissions, the workspace path, and whether the task explicitly asked to "save it to the workspace".
5. Enable the local MCP service
If you want a desktop browser, other devices on the LAN, or external clients to connect to Omnibot running on this phone, enable the local MCP service in settings.
After enabling it, validate three things first:
- The health check address is reachable.
webchat/opens successfully.- A Token has been generated, and the client is using the correct Bearer Token.
Once that works, Omnibot starts acting less like a single mobile UI and more like an accessible agent node on the LAN.
Recommended validation order
- Enable local MCP in Omnibot settings.
- Confirm the port, Token, and service state.
- Open the health check address from a browser on the same LAN.
- Then open the
webchat/page. - Finally, start one simple conversation from an external client.
If the health check is unreachable, troubleshoot the network, port, system firewall, or phone hotspot isolation first. Do not rush to debug the Agent. When the local service is not reachable, higher-level conversation will not be stable.
6. Configure remote MCP tools
Remote MCP tools are for connecting external services to Omnibot, such as search, databases, internal systems, file services, or other automation tools. Compared with ordinary skills, remote MCP is more like an external tool bus, so it is better to enable it after the base path is stable.
The remote MCP tools page supports:
- Add service
- Edit configuration
- Enable / disable
- Refresh tool list
Recommended connection path
- Connect only one simple and stable MCP service first.
- Save the configuration, then refresh the tool list.
- Confirm that tool names, descriptions, and parameters display correctly.
- Return to chat and ask Omnibot to call only this tool for one small task.
You can ask:
Check the currently available MCP tools, choose the simplest one, call it once, and tell me the result.The success criterion is not "Omnibot says it called the tool". You should be able to see that tool activity, call result, and final reply correspond to each other.
Common remote MCP issues
| Symptom | Check first |
|---|---|
| Tool list refresh fails | Service address, protocol compatibility, authentication configuration |
| Tools display but calls fail | Parameter schema, Token, server-side logs |
| Agent does not know which tool to use | Whether the tool descriptions are clear, whether the task is explicit, whether the Agent model is stable |
| Calls succeed but results are unusable | Return format, timeout settings, whether the result is too long |
7. Recommended expansion order
To avoid overlapping causes during troubleshooting, enable capabilities step by step in this order:
- Get chat, models, and core permissions working.
- Open the skill store, install or enable one lightweight skill, and ask Omnibot to list it.
- Validate workspace directories, previews, and the
.omnibot/structure. - Create a reminder for one minute later.
- Create a scheduled task that only reads the workspace.
- Validate the browser overlay and saving to the workspace.
- Enable local MCP and run the health check first.
- Connect one remote MCP tool and call it only once.
Each step adds only one new variable. That way, if Omnibot behaves unexpectedly, you can quickly tell whether the problem comes from skills, workspace, permissions, models, or the MCP service.